Working with Feature Codes
SiteVision supports the use of Feature Codes to assist with consistent and organized capture of field data. Feature Codes are contained within a Trimble Feature Library, a text file with an FXL extension that contains the definitions of feature codes, attributes, linework and symbology, and control codes.
To add a Feature Library to SiteVision, the FXL file must be placed alongside the model in the same way you would with a calibration file.
NOTE – Unlike calibration files, an FXL file does not need to exactly match the model name, it will be applied to any model in the same folder.
When working with data on Trimble Connect, simply place the FXL file in the same folder as the model you are working with. When you load the model the FXL file is automatically downloaded to your device.
When working with a model on your local device, you can manually copy the FXL file to the model folder. An example folder structure on an Android phone using the existing Sample Model is the following:

Note the location depends on your phone operating system:
-
Android: Phone\Internal\storage\Android\data\com.trimble.sitevisionAR\files\OnDevice Models\user@example.com\Sample Model\
-
iOS: Files app under Trimble SiteVision\OnDevice Models\user@example.com\Sample Model\
TIP – Publishing a model from Trimble Business Center using the SiteVision AR Exporter will automatically detect and publish any associated Feature Library.
When SiteVision detects an FXL file is present, it changes the input code field within the measure point dialog to a multi-select dropdown. This dropdown can be used to select and assign feature codes to this measurement. Alternatively, you can type in existing or custom codes.
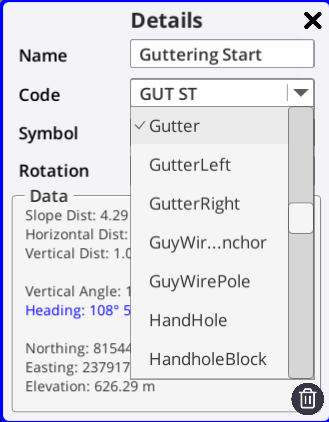
NOTE – It is possible to select and apply more than one feature code by simply selecting more than one option.
Take some measurements and apply your feature codes. For example, Sidewalk (SW) and Start Line (ST).
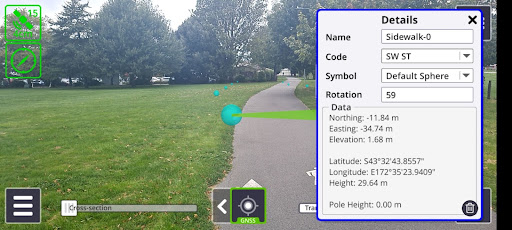
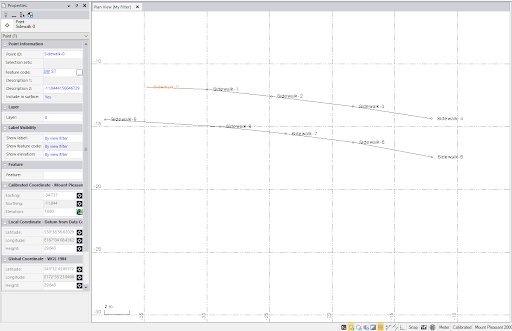
After synchronizing the measurements and importing the CSV measurements into Trimble Business Center (see Syncing Measurements for Sharing in the Office) you can see the Feature Codes have been applied to the captured points.
SiteVision also supports combining Features Codes with custom symbols. Once correctly configured, measuring a point and assigning a Feature Code will result in a 3D Symbol being automatically applied.
To enable this capability the following requirements must be met:
-
A 3D sketchup model of a symbol must be created and imported to the Symbols folder on your device (see Creating and importing custom symbols):

-
The Feature Library FXL file must contain a Feature Definition with both a Feature Code and applied Symbol:
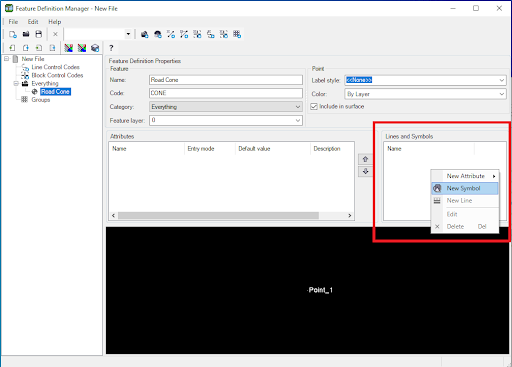
NOTE – Use the Feature Definition Manager to configure and edit your Feature Library if needed
-
Finally, the names of the feature library Symbol and the sketchup model custom symbol must match:
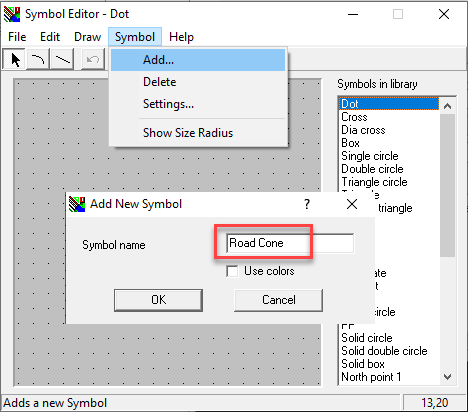
TIP – If you are creating a new symbol you will need to add a drawing to your new symbol otherwise it will not be able to be assigned to a Feature Code.
Once this configuration is complete, measure a point and assign the feature code. The 3D custom symbol is automatically selected:
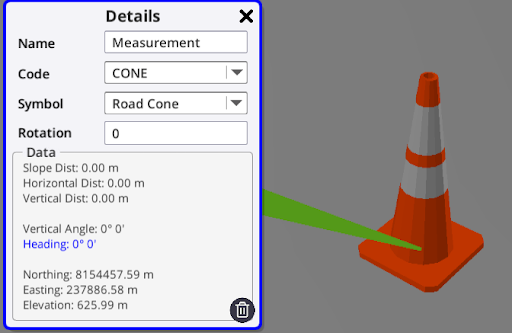
NOTE – The selected symbol can still be changed and overridden, and any subsequent measurements will use this overridden symbol.