Uploading Data To Trimble Earthworks
When you create a design using the Plane app or the Profile app, it is compatible with the Trimble Earthworks machine control system. Using the Trimble File Flipper app, you can transfer the design directly to a machine in the field, via a USB stick.
TIP – The Create new model workflow is an easy way to quickly create a one-off design for immediate use in the field.
Before you start, make sure you have:
-
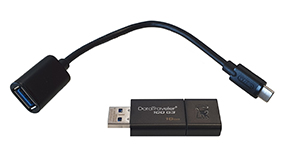
a USB stick compatible with your Trimble Earthworks display.
-
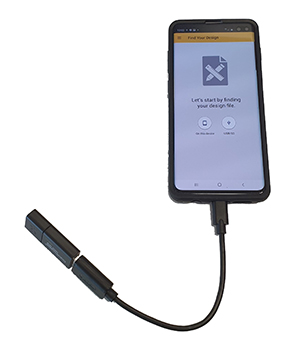
an appropriate USB cable to connect your USB stick to your device as a readable device. This cable is typically referred to as an OTG or “On The Go” cable.
-
installed the Trimble File Flipper app on the device that is running SiteVision from

When you have created your design using the Plane app or the Profile app, to transfer the design to a machine in the field:
-
-
Open the File Flipper app on the device.
-
In the File Flipper app, select On this device.
-
Tap
 and search for dsz.
 -
Select your design, then tap Continue.
NOTE – You can only select one design at a time.
-
Select Earthworks.
-
When prompted Is this a new project?, do one of the following:
-
If you have an existing Earthworks project on your USB stick, tap No.
-
Select USB/SD.
-
If you are prompted to register your USB stick, tap Continue.
-
Tap
 in the top left and select your USB stick from the list.
 -
Tap the blue bar to allow access to your USB stick.
-
-
Select the appropriate project and tap Continue.
-
Review the selections then tap Save Your Design.
-
-
If you do not have an existing Earthworks project on your USB stick, tap Yes to create a new project.
-
Select USB/SD.
-
If you are prompted to register your USB stick, tap Continue.
-
Tap
in the top left and select your USB stick from the list. -
Tap the blue bar to allow access to your USB stick.
-
-
Name your project, then tap Continue.
-
When promoted Will you be using GPS? tap Yes.
-
Select Local Site Calibration.
-
Select On this device.
-
Tap
and search for cal. -
Select the appropriate .cal file that matches your design, then tap Continue.
-
If you are using a Geoid, tap Yes and follow the subsequent steps to select the appropriate Geoid file.
NOTE – If you used the Create New Model feature in SiteVision, find and select ww15mgh.
-
Select On this device.
-
Tap the Geodata folder.
-
Select the appropriate Geoid file that matches your coordinate system.
-
Review the selections then tap Save Your Design.
-
-